Salesforce commerce cloud
1. Introduction
The Worldline Salesforce Commerce Plugin (Cartridge) provides your customers with a seamless payment experience in your Salesforce Commerce Cloud website, allowing them to spend more time shopping and less time checking out!
Worldline Salesforce Commerce Plugin features the following:
- It supports both our Hosted Payment Page and FlexCheckout channels!
- It offers a vast selection of major international and preferred local payment methods
- Leverages our platform features such as conversion optimisation and fraud prevention.
Check our documentation to get started with your integration.
2. Create Worldline account
To process transaction on our platform with Salesforce Cloud Commerce, you need an account on our platform.
A great way to get to know our service is to sign up for a merchant test account on our platform. It is easy and quick to sign up. Once you are ready to go live, check out here how to get a production account or contact us!
To use this plugin, the following options need to be active in your account:
- DPR DirectLink (new transactions)
- DQY DirectLink (Query)
- DMT DirectLink (maintenance)
- D3D Direct Link 3D
- OPC (One page checkout)
If you want to offer recurring payments to your customers, make sure that option Alias Manager (RECX) is also active.
You can check this in your Back Office via Configuration > Account > Your options > Available options or Default Options.
In case one of the options is not available in your PSPID, please contact us.
3. Configure Cartridge
Setup: To begin with your installation, download the Ingenico_configuration_plugin archive file and follow these instructions to have a quick and easy integration with your Salesforce Commerce Cloud website.
The archive file contains:
- The cartridge – will be installed and configured from UX Studio (Eclipse);
- A configuration file in ZIP format – will be imported and installed in Business Manager interface;
- The documentation (integration details) in PDF / word format – will describe all installation and integration required steps for both cartridge and configuration file.
Import Meta data for Payment Cartridge
To begin with the configuration, you first need to Import the Meta Data for the Payment Cartridge provided in the archive file.
Note: Before you import the file, rename the directory (SiteGenesis) inside the downloaded archive file:
- The directory is metadata/site-template/sites/SiteGenesis and rename it to Site-template/sites/<Your site>
Example: If your site name is ‘OnlineStore’ then you should rename the directory to metadata/site-template/sites/OnlineStore.
You can do this by uncompressing the archive file, renaming the directory like shown above and compressing the directory structure again as ‘payment_site.zip’.
Alternatively, you can use an online application such as 7-zip to rename the directory.

To Import the Metadata, follow these steps:
- Go to Business Manager > Administration > Site Development > Site Import & Export.
- Go to Import > Upload Archive section, choose "payment_site.zip" file which comes together with the cartridge.

- Upload the file.
- With the file uploaded, Select it in the list of uploaded files.

- Click the ‘Import’ button and confirm that you wish to import the selected archive by clicking the ‘Ok’ button.

- Wait until the import job is successfully completed. Once complete, you will get a ‘Success’ status to indicate that your payment methods, Payment processors, custom objects have been successfully installed.

Install Cartridge
| Compatibility |
|
Follow the steps below in order to import the int_payment_pipelines or int_payment_controllers cartridge, depending on the development model used for your web site:
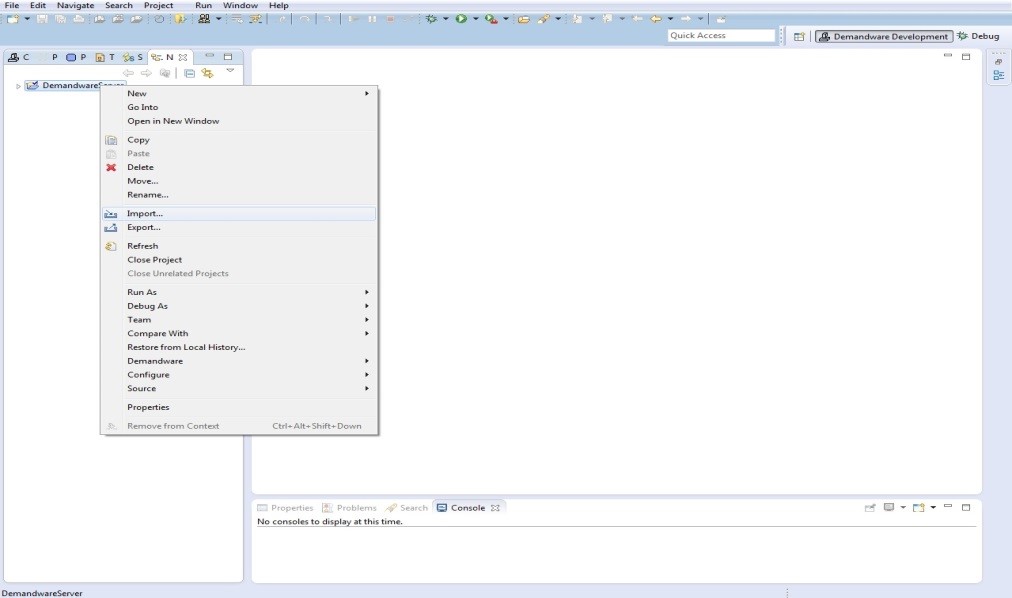
- Select the connection to the SFCC server > 'Import'.
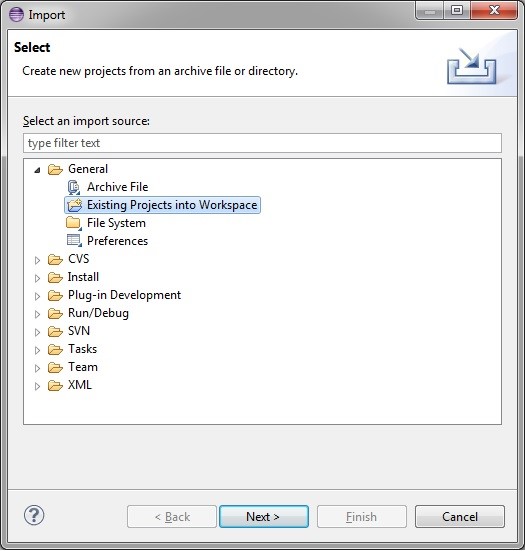
- Select ‘Existing Project into Workspace’
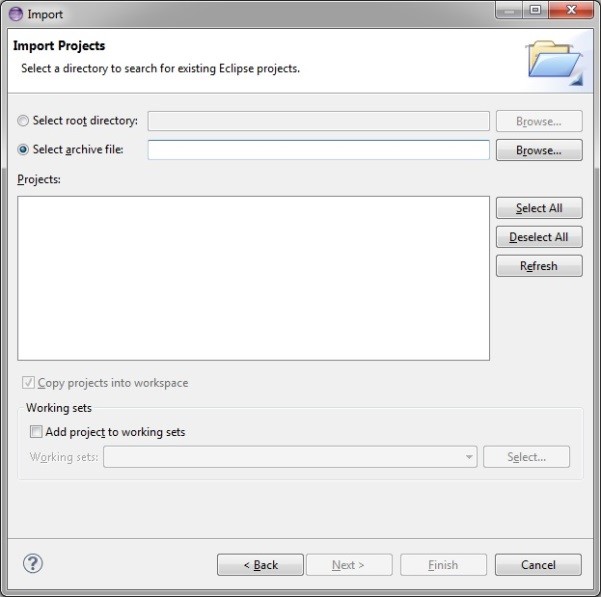
- To import Projects, choose > Select archive file (or Select root directory if you have already unzipped the cartridge).
.jpg.png?language_id=1)
- Select the archive from your local source (or the unzipped cartridge).
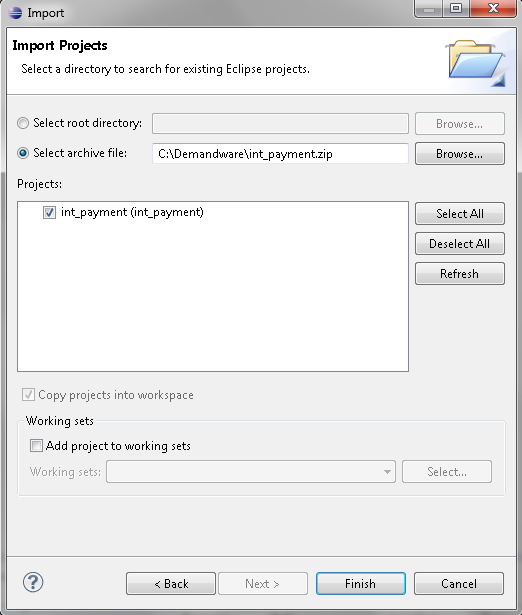
- Click ‘Finish’ and ‘Yes’ in order to complete the import.
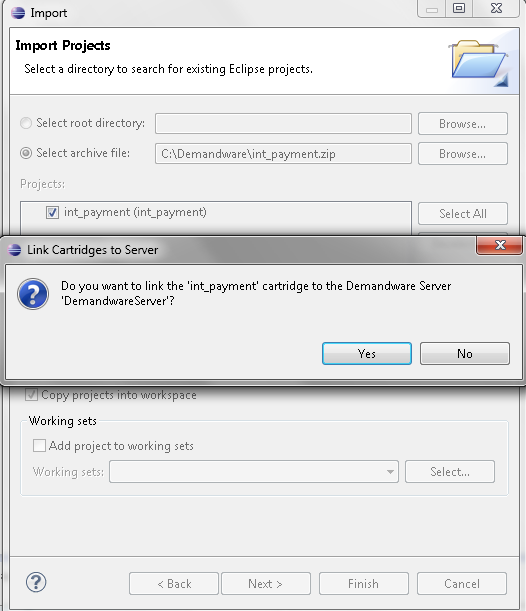
- After successfully completing these steps the cartridge will be added to your project.
- You will also need to check if it was also added to Project References.
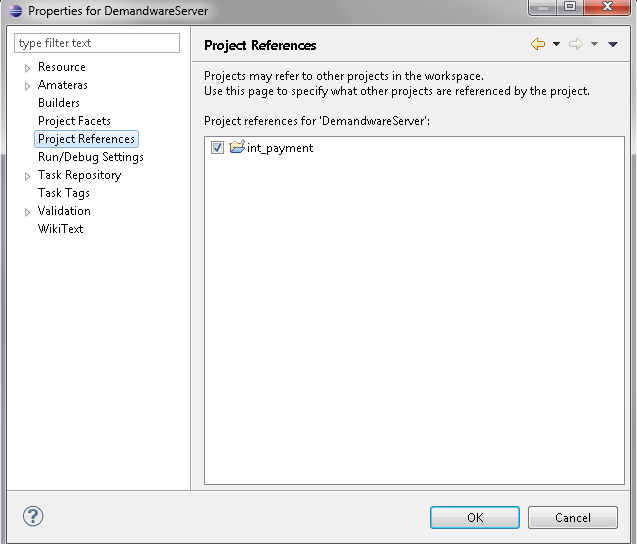
- Repeat the steps for bm_payment and int_payment_core cartridge.
4. Select payment methods
Finally, you need to configure the payment methods in your plugin that you have activated in your Worldline account in order to offer them to your customers. To do so, follow these steps:
- Login to the Worldline Back Office. Check via Configuration > Payment methods for active payment methods. You can add all those to your Salesforce Commerce Cloud admin panel via the next steps

- Login to the SFCC Business Manager> Go to Site Genesis > Ordering
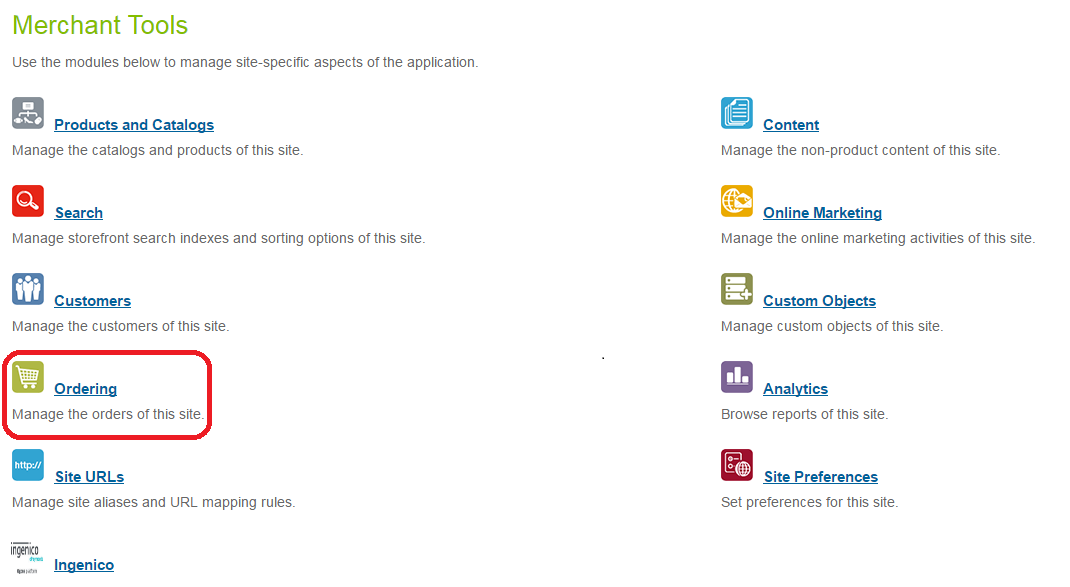
- Next go to > Payment Methods. Select “Enabled – Yes” for each payment method you would like to offer to your customers.
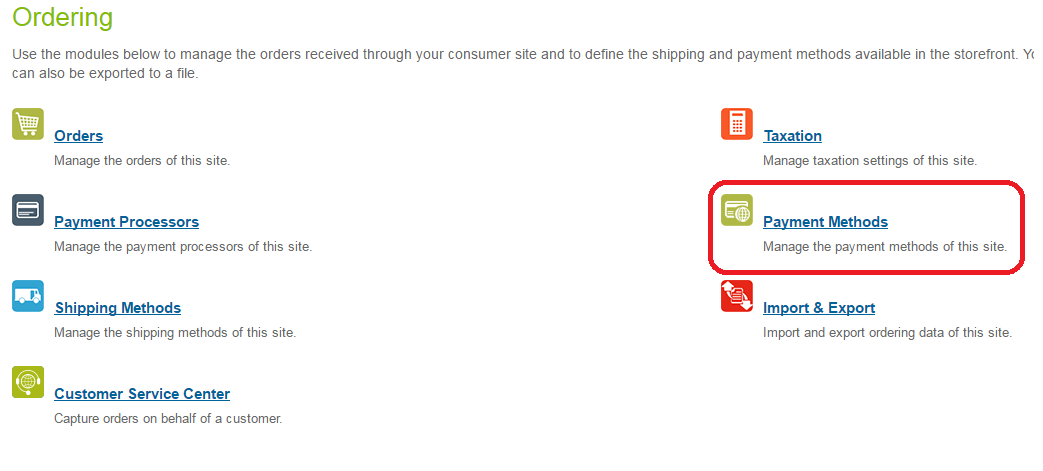
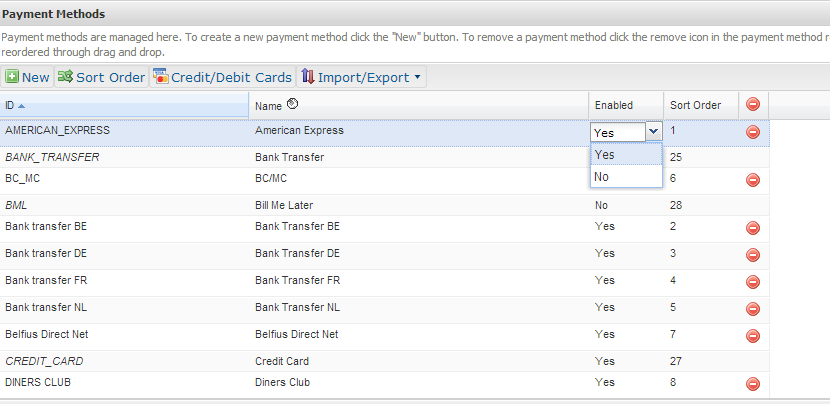
Note that the payment methods must be activated in Worldline BackOffice for them to be available as a payment method in the SFCC Business Manager.
Our Hosted Payment Page will feature all these payment methods to your customers during the checkout process. The same applies for FlexCheckout mode.
5. Customise your payment page
Make sure your customer goes all the way until the payment thanks to a customized payment page.
Learn how to do it here for the Hosted Payment Page and here for FlexCheckout.